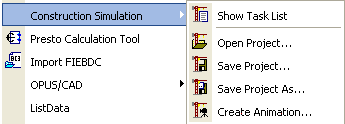
The commands of the Construction Simulation hierarchical menu allow you to simulate the construction process with ArchiCAD's 3D model by associating construction elements to a task list. This list can be created within ArchiCAD or (in Windows only) imported from a Microsoft Project database.
Note: The Construction Simulation menu is only available when the Floor Plan Worksheet is the active Window. Only one Construction Simulation project (task list) can be linked to an ArchiCAD Project. Opening a Construction Simulation Project with another ArchiCAD Project will create unresolved references. The menu's commands are:
Start this installer and follow the instructions. The add-on will be automatically loaded the next time you start ArchiCAD.
The new set of commands will appear in the "Document/Schedules and Lists/Construction Simulation" submenu by default.
Go to ArchiCAD and choose the Document > Schedules and Lists > Construction Simulation > Open Project command. In the dialog that appears, select the file you just saved from MS Project. Click Open.
The Construction Simulation dialog box opens.
The dialog box includes the following fields: Tasks, Type, Progress, Start Date and Finish Date. Fields can be edited by double-clicking in them. Clicking on any header will sort the task list by that key.
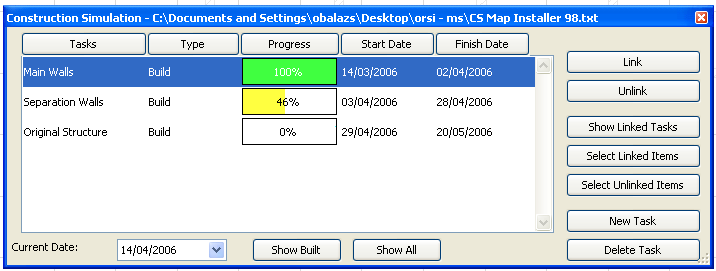
The Tasks, Start Date and Finish Date fields are imported from MS Project. You can either keep these or overwrite them, and you can manually enter new tasks.
The Progress field is automatically filled by ArchiCAD to conform to the Current Date defined at the bottom of the dialog box. Otherwise, this field is not editable.

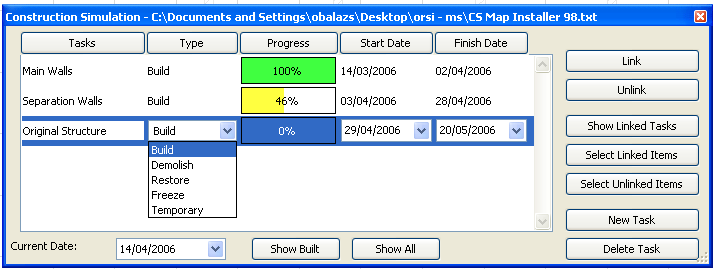
Types are defined manually with a pop-up menu listing task types. There are five types of construction tasks:
When the task list is complete, you can start linking ArchiCAD elements to the items of the task list.
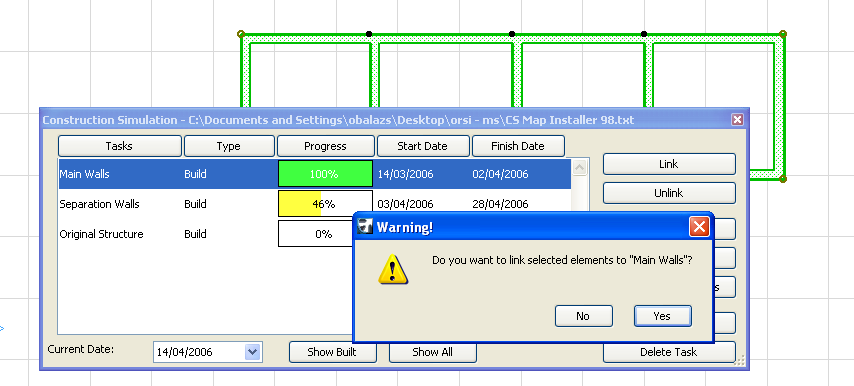
Go to the Floor Plan Window and select some elements. In the Construction Simulation dialog box, select the task that you wish to link the elements to and click the Link button on the right.
Note: Any element can be linked to as many as 10 tasks at the same time.
The buttons on the right-hand side of the Construction Simulation dialog box allow you to manage the task list.

The Current Date field allows you to check the date or to choose another day to show the state of the building.
The Show Built button will show elements in their current state. It will also move all elements whose construction has not started yet on a hidden layer called "CS Hidden Layer". These elements will not appear in either ArchiCAD Window until you choose to show them again.
Clicking the Show All button will revert the display of all elements to their "normal" state. It will also move the elements hidden by the Show Built button back to their original layers.
Different construction states are displayed in different ways. ArchiCAD divides the linked elements into three categories according to the current date. This division is triggered when the Show Built button is clicked.
Choosing the command displays the Animation dialog box.
On top of the dialog box, you can define the starting and finishing date of the simulation.
In the middle section, you can define the interval in days. The number of frames field is grayed, as it uses the current setting of the Create Fly-Through command. In the bottom part, you can choose between using the current view or an existing camera path for creating the animation.
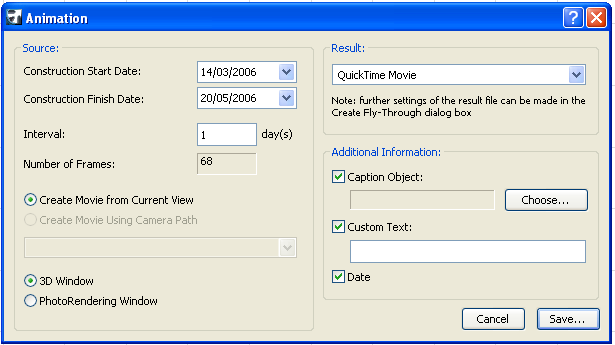
Note: If you choose the current view, check your settings in the Image > 3D Projection Settings dialog box and make sure that a perspective view is set up.
On the right, you can choose to save the movie in QuickTime Movie or AVI (Windows only) format and define additional information such as a caption and custom text. When you click Save, you can define the location of the animation file.
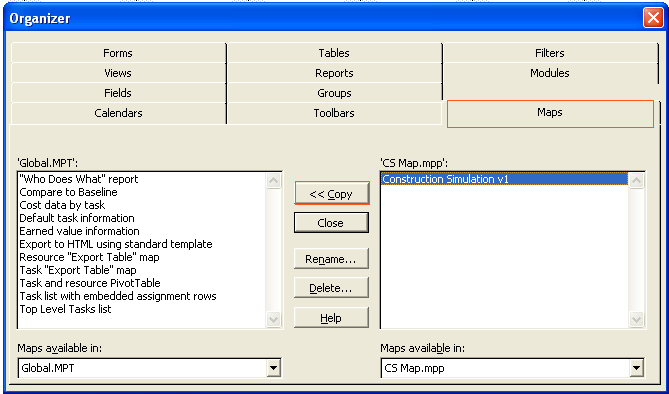
Before you can export a Project from Microsoft Project to ArchiCAD, first you need to open the CS Map.mpp file in MS Project. Then go into the Tools Menu > Organizer > Maps Tab Page and copy the Construction Simulator v1 map from the right side into Global.MPT
When creating the Task list in MS Project, you have to follow a strict naming convention - before the task names you need to use the following prepositons:
The date format must be MM/DD/YYYY format: e.g: 4/14/2010
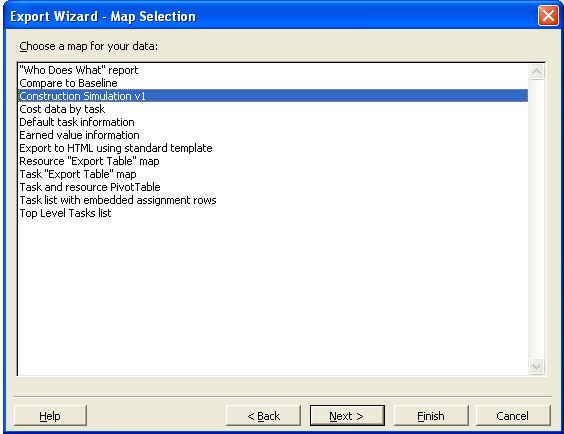
When saving the MS Project file, choose File > Save as. Select the text file format and click Save. In the appearing Export Mapping dialog, select the "Construction Simulation" format and click the Save button.
The software is provided to you "AS IS" and you acknowledge that it may contain errors. Graphisoft disclaims any warranty or liability obligations of any kind.